Lors de la première utilisation d'Agilitest ou en cours d'utilisation, vous pouvez configurer le logiciel pour optimiser son utilisation. Agilitest fonctionne principalement avec les paquets ATS et Java (JDK) qui seront utilisés pour créer, maintenir et exécuter des projets automatisés.
En haut à droite de l'éditeur se trouvent plusieurs menus d'assistance, dont le menu"Paramètres".
.png)
Cliquez sur l'onglet "Paramètres"pour ouvrir la fenêtre dans l'éditeur
.png)
Paramètres d'agilité
Rapport d'erreur
Vous pouvez activer les rapports d'erreur (ou journaux) en cochant la case"Rapports d'erreur".
.png)
Trois options d'enregistrement sont disponibles :
- Les journaux de démarrage, au cas où Agilitest se bloquerait au lancement.
Ensuite, les journaux d'exécution des tests afficheront les erreurs techniques (liées à un driver, et non les erreurs fonctionnelles) :
- Pour ouvrir les journaux actuels, vides par défaut, qui affichent les derniers journaux créés
- Pour ouvrir le répertoire des journaux dans votre explorateur Windows et avoir accès à l'historique des journaux
Langues
Dans ce menu de configuration, vous pouvez également changer la langue en anglais ou en français.
.png)
Outils obligatoires
Il y a deux conditions préalables au bon fonctionnement d'Agilitest : lepackage ATS et le JDK.
Paramètres ATS
Agilitest nécessite une bibliothèque ATS à jour pour fonctionner.
.png)
À partir de ces configurations, vous pouvez :
- Créer une configuration: Cette option crée une configuration globale de l'ATS dans le système. En cliquant dessus, vous pouvez modifier la configuration.
- Télécharger les composants ATS
- Télécharger ATS
- Créer une configuration Neoload
- Ouvrir un répertoire Maven
- Ouvrir un répertoire ATS
Comment mettre en place l'ATS?
Il est également possible de configurer certaines fonctions de l'éditeur Agilitest via le fichier de configuration .atsProperties.
Pour accéder aux propriétés de l'ATS , cliquez sur le bouton "modifier la configuration"des paramètres de l'ATS
%20(1).png)
Les paramètres actuellement autorisés sont les suivants :
- Nombre par défaut d'exécutions de chaque action dans l'éditeur avant de décider d'un échec. Par défaut, il est fixé à 10.

- Positionnement des fenêtres ouvertes automatiquement par l'éditeur. Par défaut, les coordonnées du coin supérieur gauche sont fixées à x=20 et y=20.
- Dimensionnement des fenêtres ouvertes automatiquement par l'éditeur : largeur et hauteur fixées par défaut à 1500 x 960
.png)
- Gestion du "timeOut" sur l'exécution des scripts et le chargement des pages web. Par défaut, il est fixé à 60ms et 120ms.
%20(2).png)
- Gestion des chemins d'accès aux différents navigateurs et des temps d'attente spécifiques pour chacun d'entre eux :

- Gestion des chemins d'accès aux différentes applications de bureau Windows installées sur l'ordinateur. Un raccourci sera automatiquement créé à partir du menu "Applications" dans l'action de démarrage d'un canal.
.png)
Vous trouverez l'application enregistrée dans les propriétés directement dans les applications lorsque vous ouvrirez un canal

🔸 Avertissement
Les chemins d'accès devront être adaptés en fonction de votre configuration.
Paramètres de Java (JDK)
Java permet de charger, de compiler et d'exécuter des projets ATS .
Dans le menu de configuration, il est possible de télécharger le JDK ou de saisir le chemin d'accès à un JDK existant sur votre ordinateur.
.png)
🔸 Avertissement
Vous avez besoin d'au moins une version 11 du JDK pour que Agilitest fonctionne.
Il est également possible à partir de cette interface d'ajouter des arguments d'exécution Java pour le lancement des tests en cliquant sur le bouton"Ajouter un argument".
.png)
Connexions externes
Serveurs de stations mobiles ATS
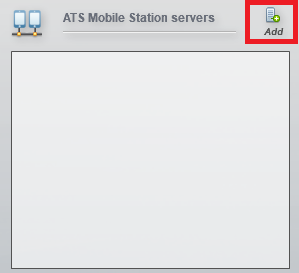
Il est possible de configurer un serveur ATS Mobile Station pour qu'il se connecte automatiquement au serveur de configuration lors de vos tests mobiles.
En cliquant sur le bouton"Ajouter", il vous sera demandé de saisir l'adresse IP et le port, qui seront récupérés directement à partir de l'interface de la station mobile.

Vous pouvez consulter notre documentation sur les tests mobiles.
Comptes GIT
Le compte Git dans Agilitest permet de cloner un compte Git existant et donc d'utiliser un projet Git.
Cliquez sur le bouton "Ajouter"pour ajouter un compte
.png)
Saisissez ensuite les informations relatives à votre compte Git.
.png)


